The FE deployment process is divided into four main steps:
- S3 Bucket Setup
Set up an Amazon S3 bucket to store the frontend application's static files, such as HTML, CSS, JavaScript, and images. - AWS Certificate Manager (ACM) Setup
Request and validate an SSL/TLS certificate for the domain we intend to use. This step also requires configuring the domain's DNS records through the Domain Provider to validate the certificate and enable secure HTTPS access. - CloudFront Setup
Configure Amazon CloudFront as the Content Delivery Network (CDN) to distribute the frontend files stored in S3. CloudFront also handles HTTPS connections using the SSL/TLS certificate configured in ACM and connects the custom domain to the frontend application. - CI/CD Setup Using GitHub Actions
Configure GitHub Actions to automate the deployment process. When changes are pushed or merged into the designated branch, the workflow builds the frontend application and uploads the generated files to S3. CloudFront's cache can then be invalidated to ensure users receive the latest version.
S3 Setup
- Create bucket
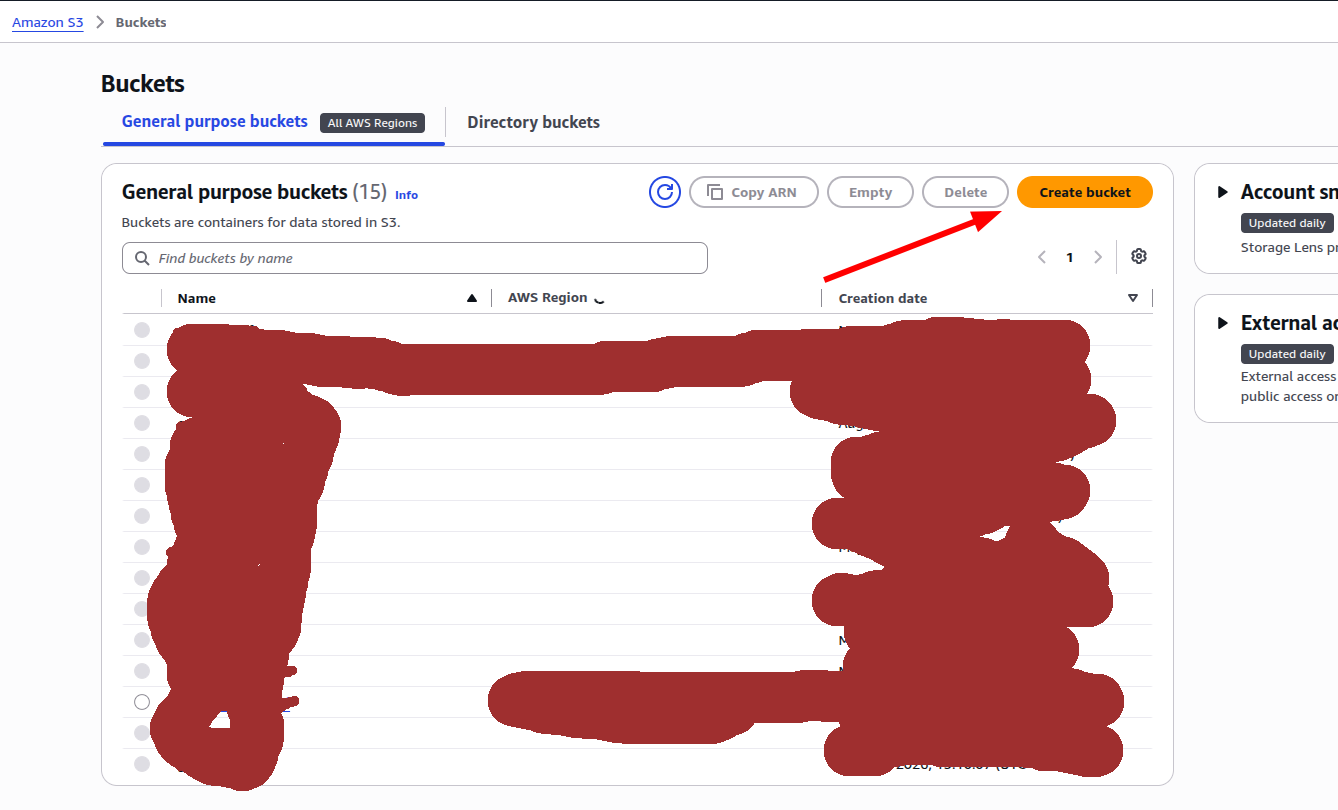
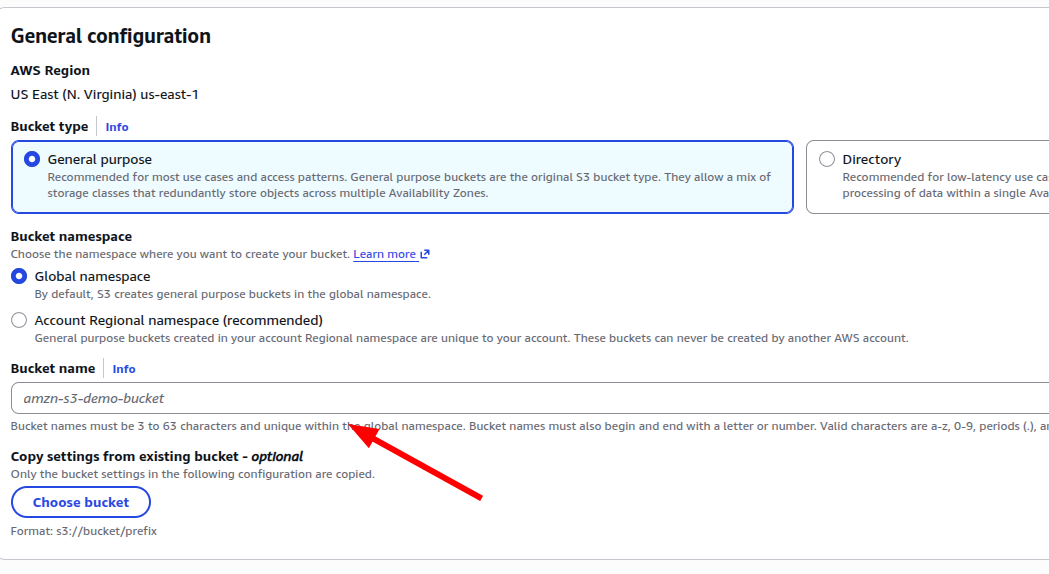
- Add bucket name e.g. growsocials-l-a-f
- If possible, we can copy settings from an existing bucket
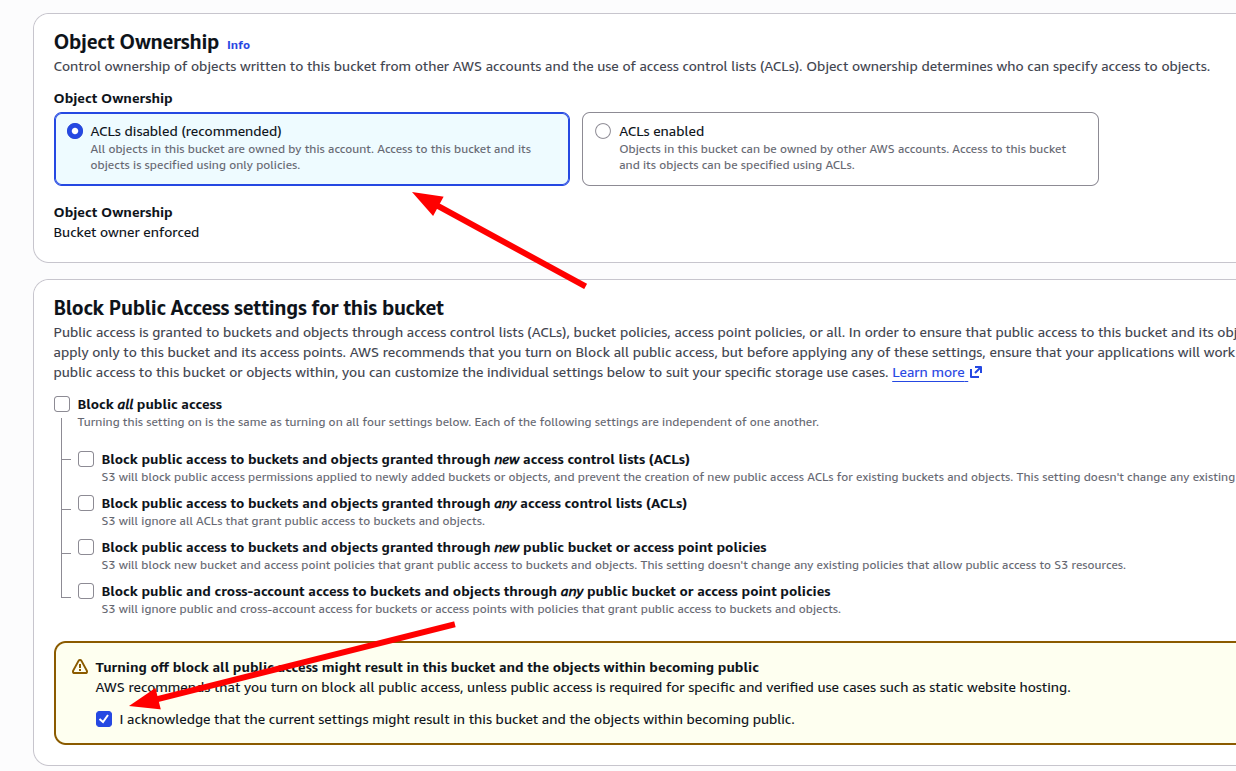
- Object ownership: choose ACLs disabled
- Turn off all public access and check the “I acknowledge that the current settings might result in this bucket and the objects within becoming public.”
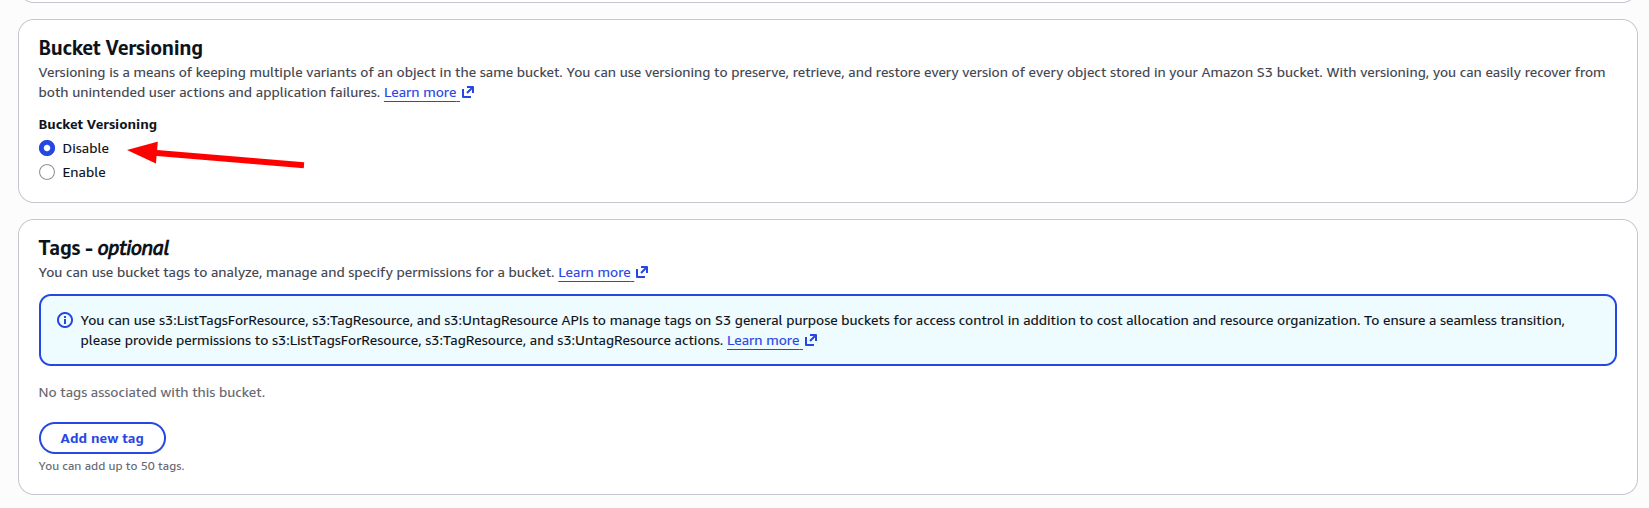
- Disable the Bucket Versioning
- Leave the tags empty
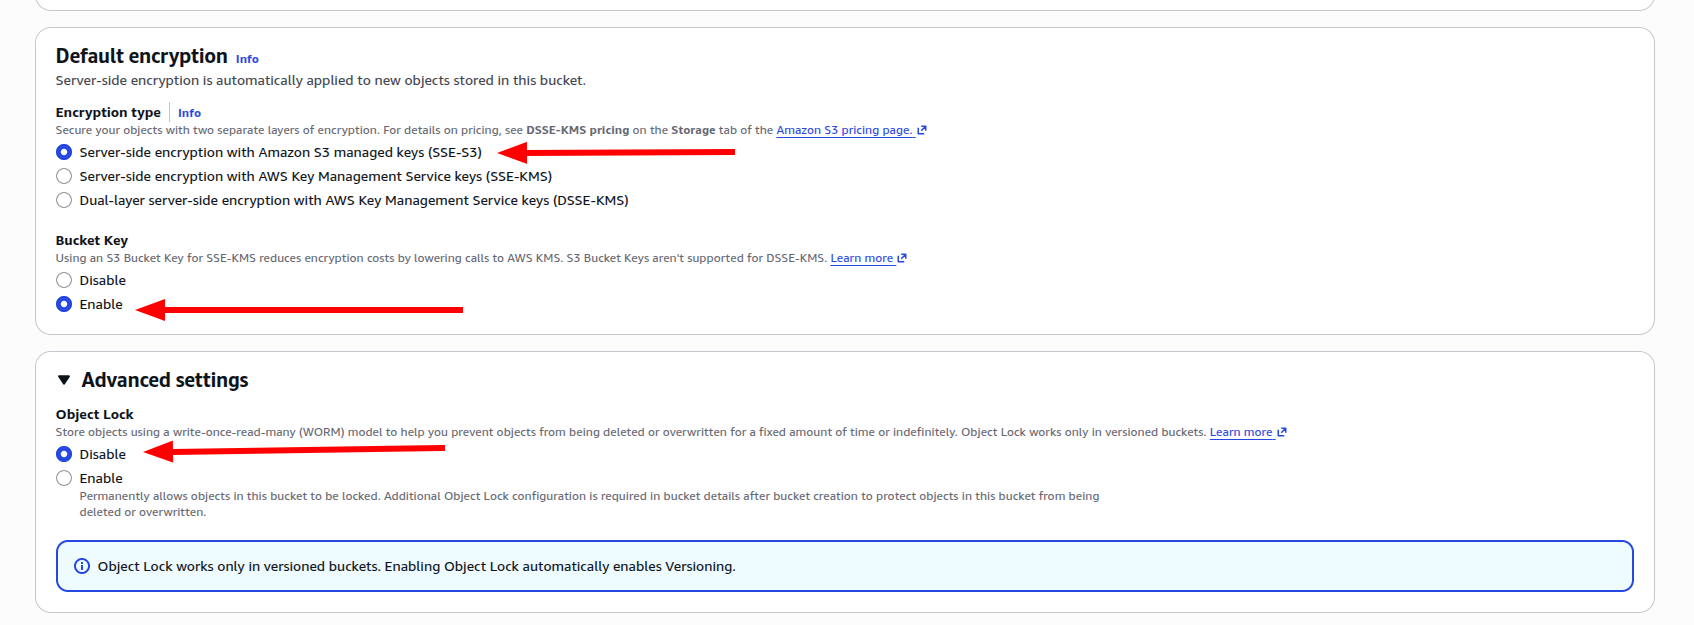
- Encryption type choose: Server-side encryption with Amazon S3 managed keys (SSE-S3)
- Enable the Bucket Key
- Disable the Object Lock
- Settings done; now create the bucket. Once we create the bucket, the screen will navigate to the bucket details, as shown in the image below.
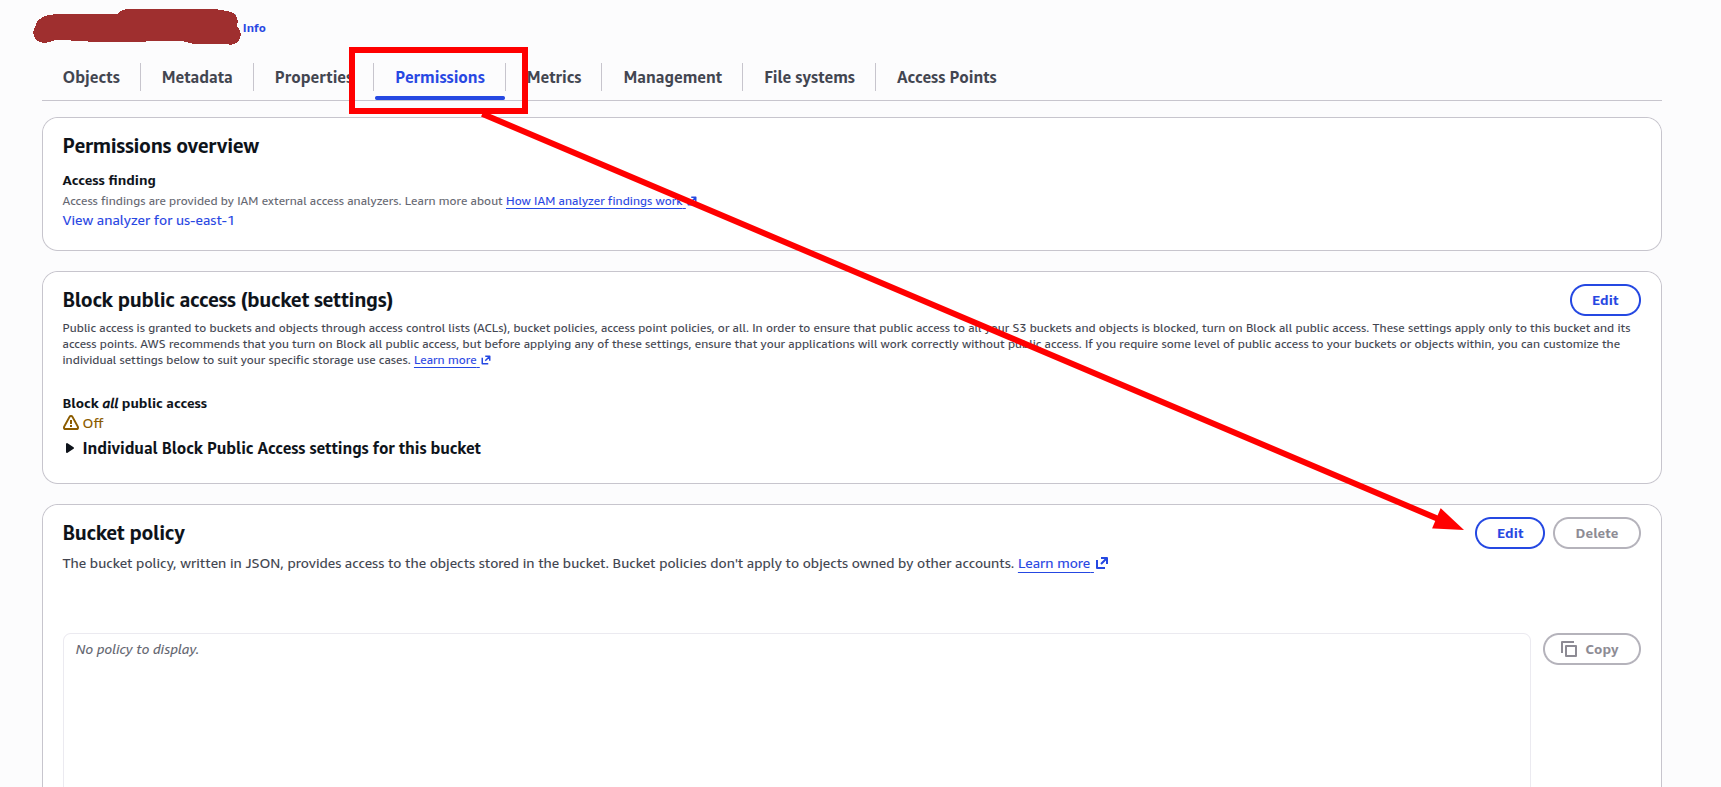
- Once it’s done, we need to change the Bucket Policy inside the Permissions tab
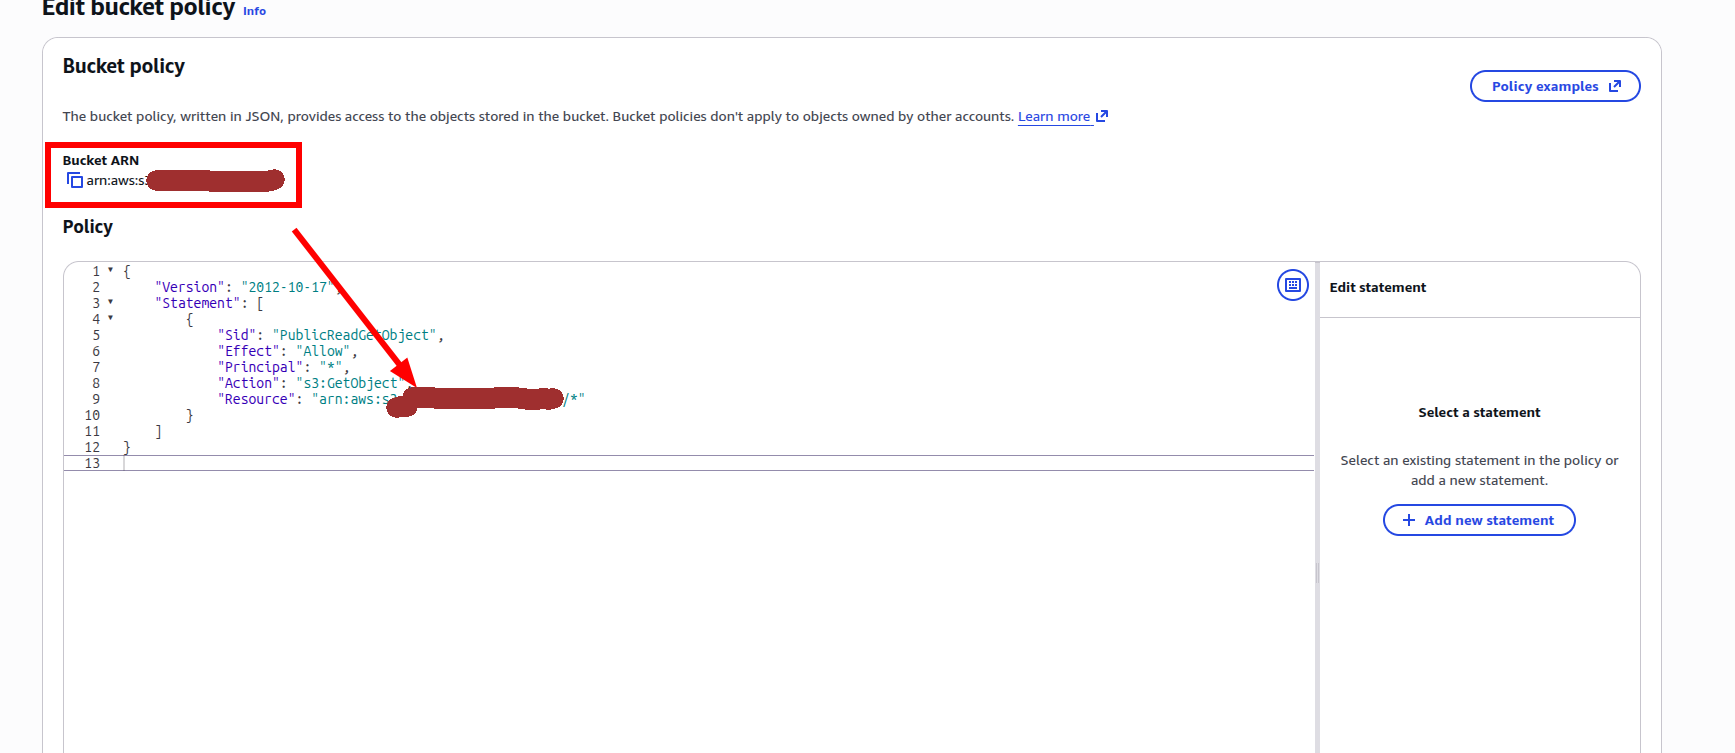
- Use this template for the bucket policy:
{
  "Version": "2012-10-17",
  "Statement": [
    {
      "Sid": "PublicReadGetObject",
      "Effect": "Allow",
      "Principal": "*",
      "Action": "s3:GetObject",
      "Resource": "........................."
    }
  ]
}
- Change the “Resource” value with the “Bucket ARN” `Bucket ARN value /*` and Save
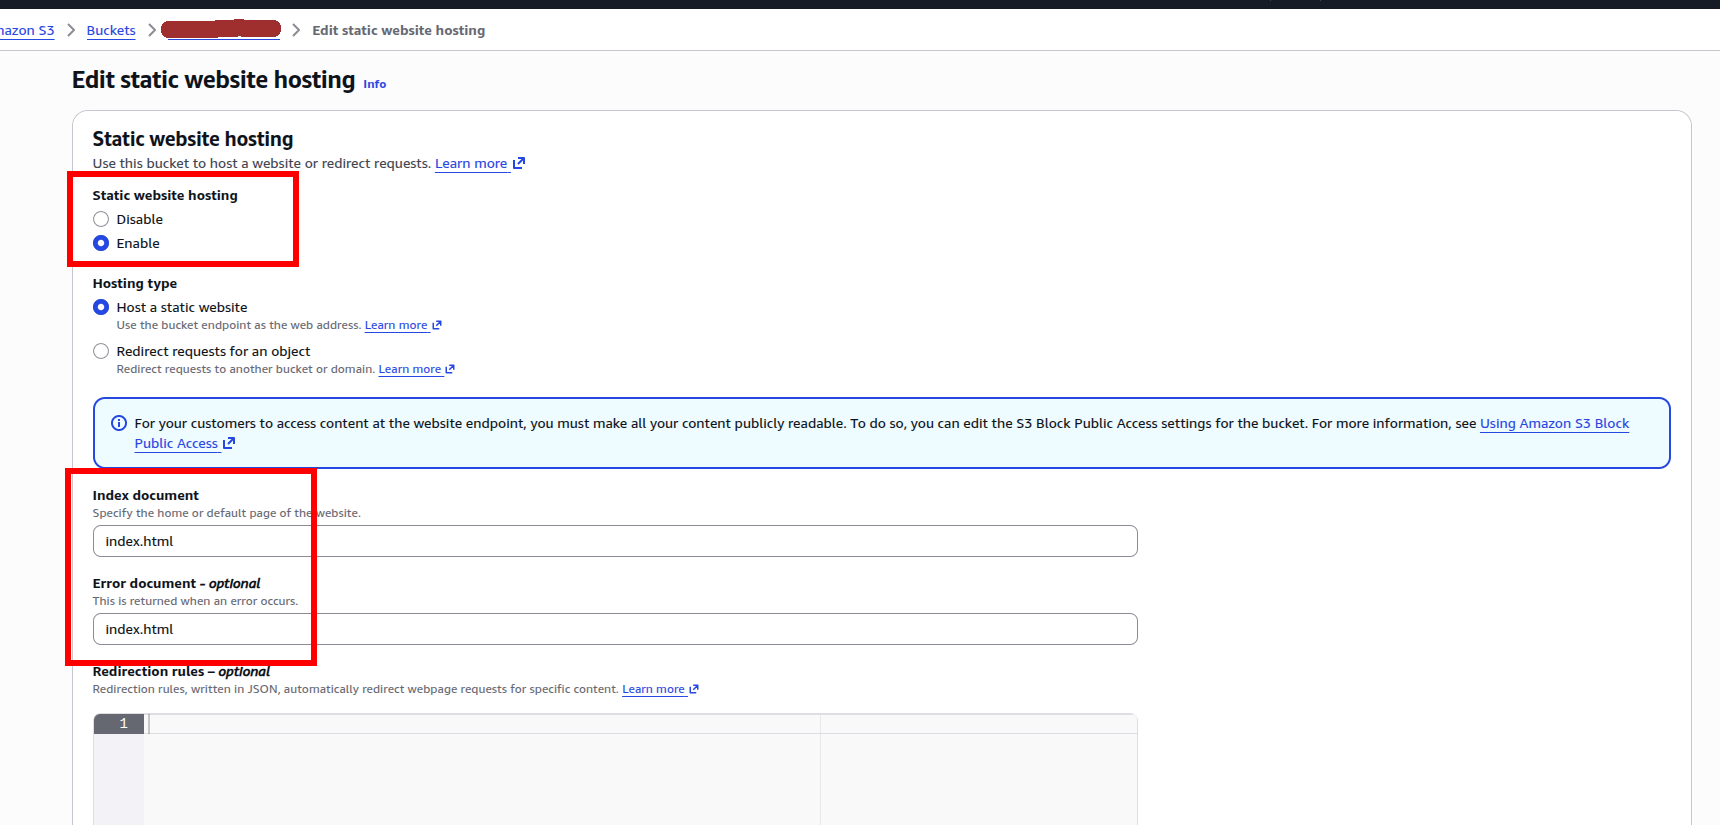
- Edit the Static website hosting inside the Properties tab.
- Enable static hosting, index document, and error document; both add
index.html
Certificate Manager Setup
- Request certificate
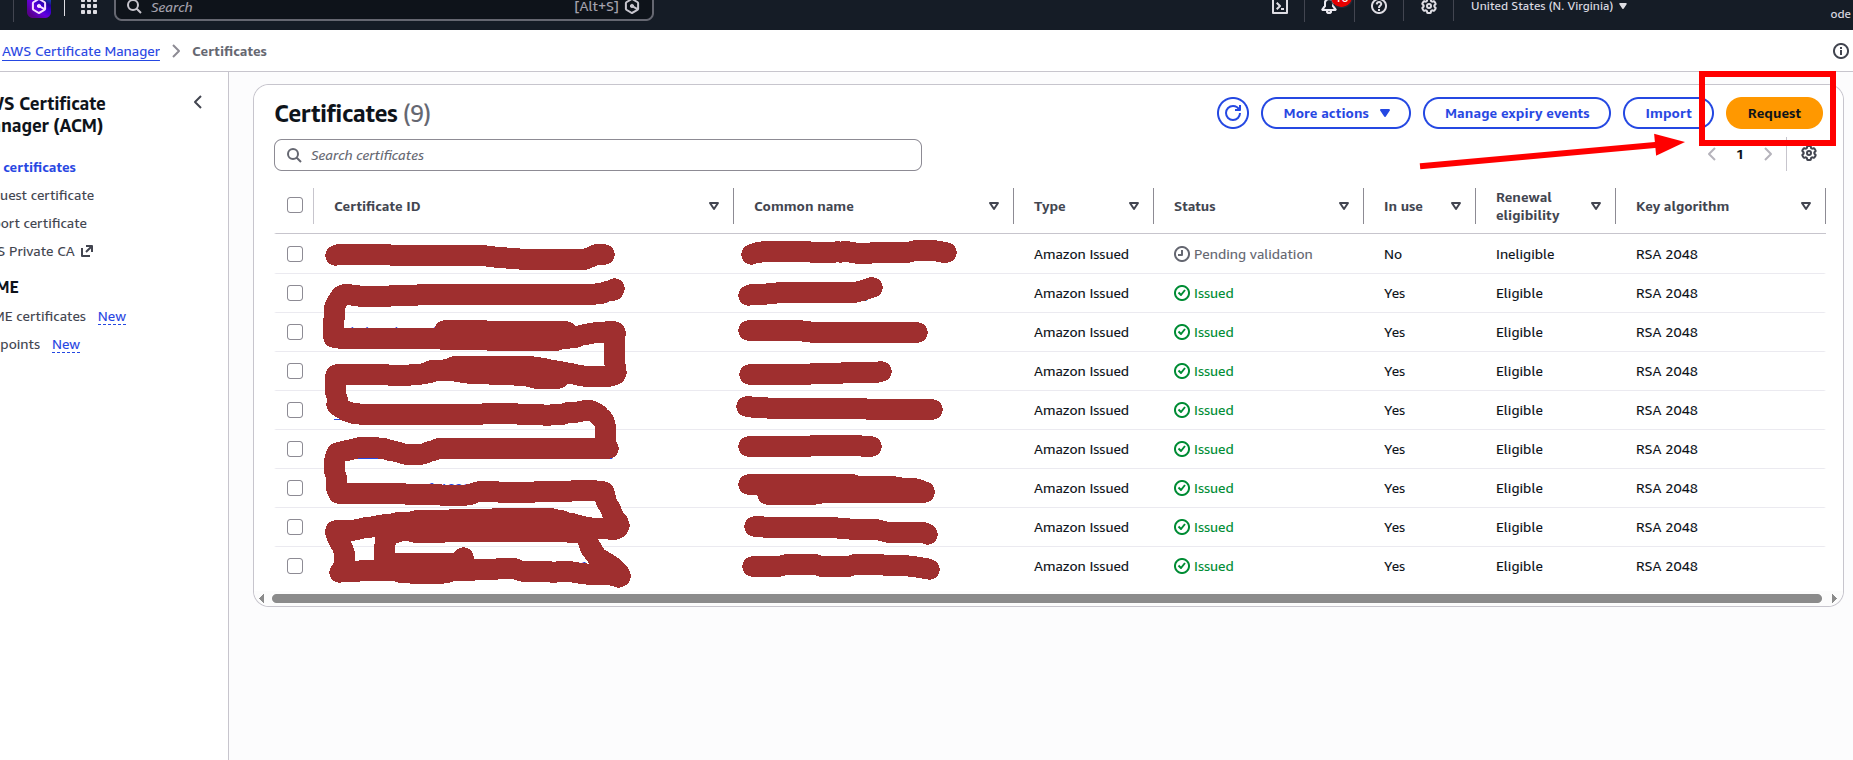
- Add domain name for the certificate

- Allow Export

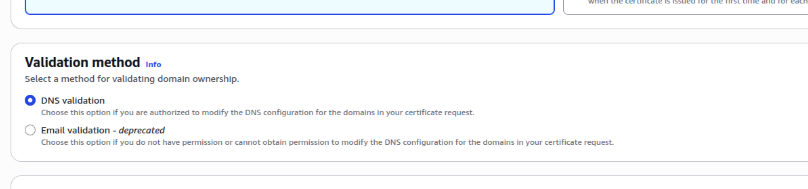
- Validation method: choose DNS validations
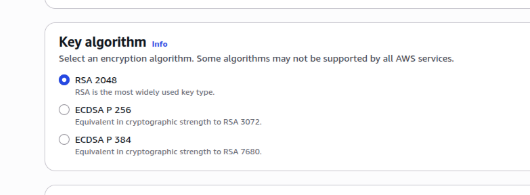
- Key Algorithm: choose RSA 2048
- Leave the Tags empty and click on the Request button

- Open the certificate details and check the Domains section
- Copy the CNAME name and CNAME value
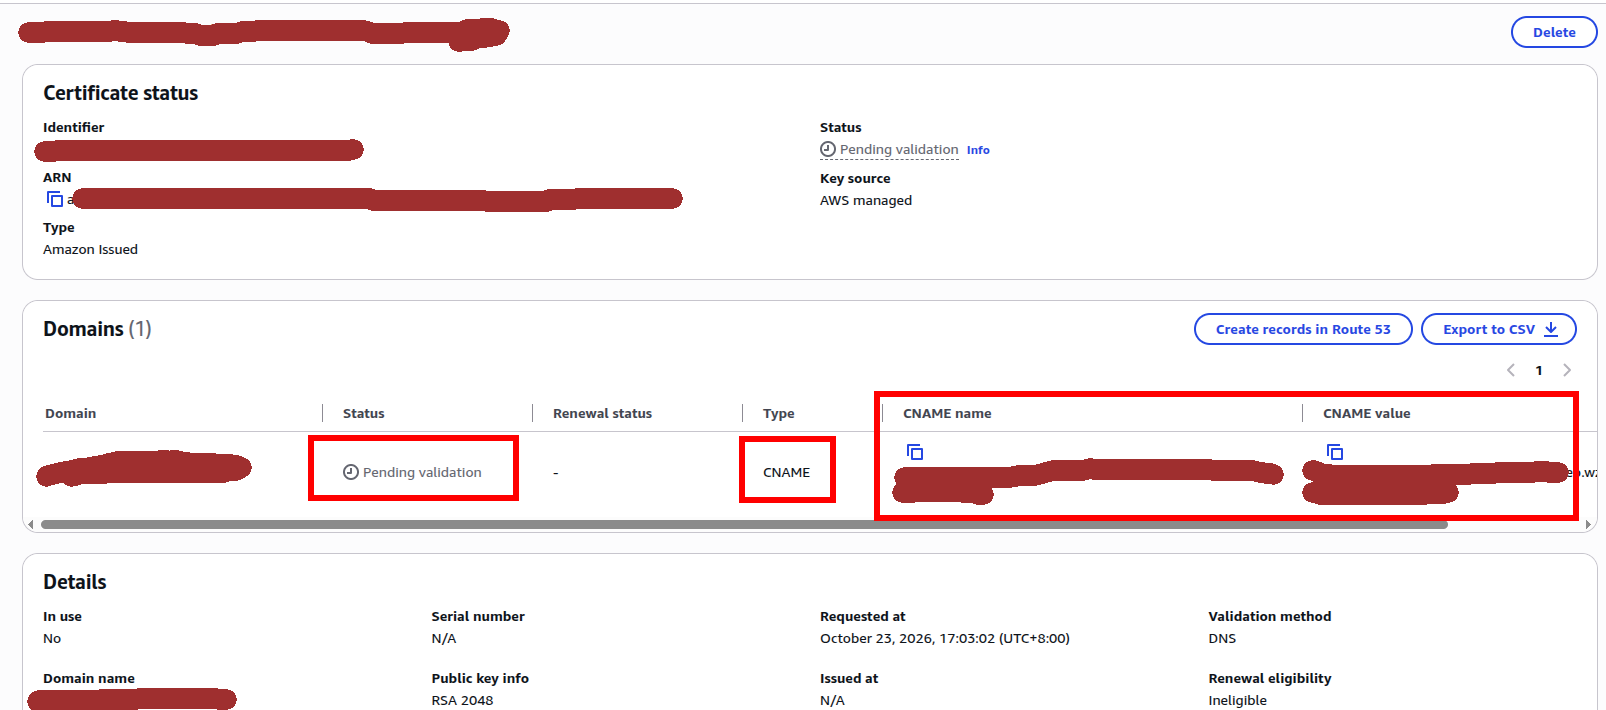
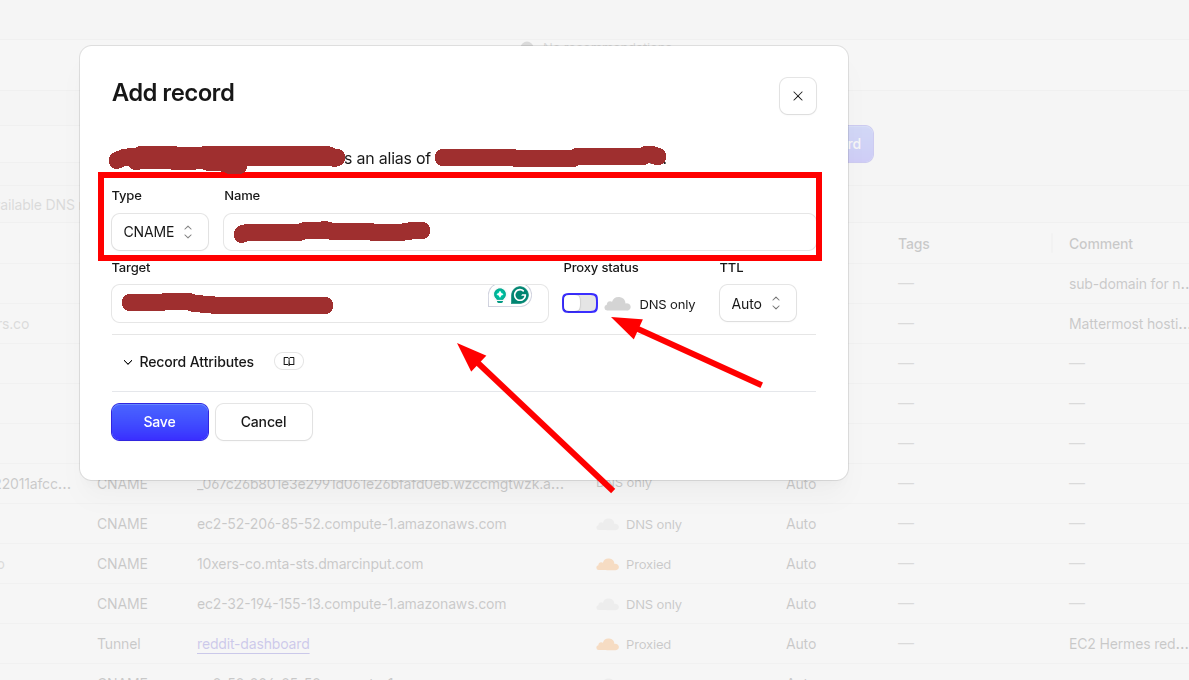
- Register the CNAME name and **CNAME value **to the domain DNS settings. In example bellow was DNS settings from **Cloudflare Pages. **Disable the proxy because we will use it from Cloudfront.
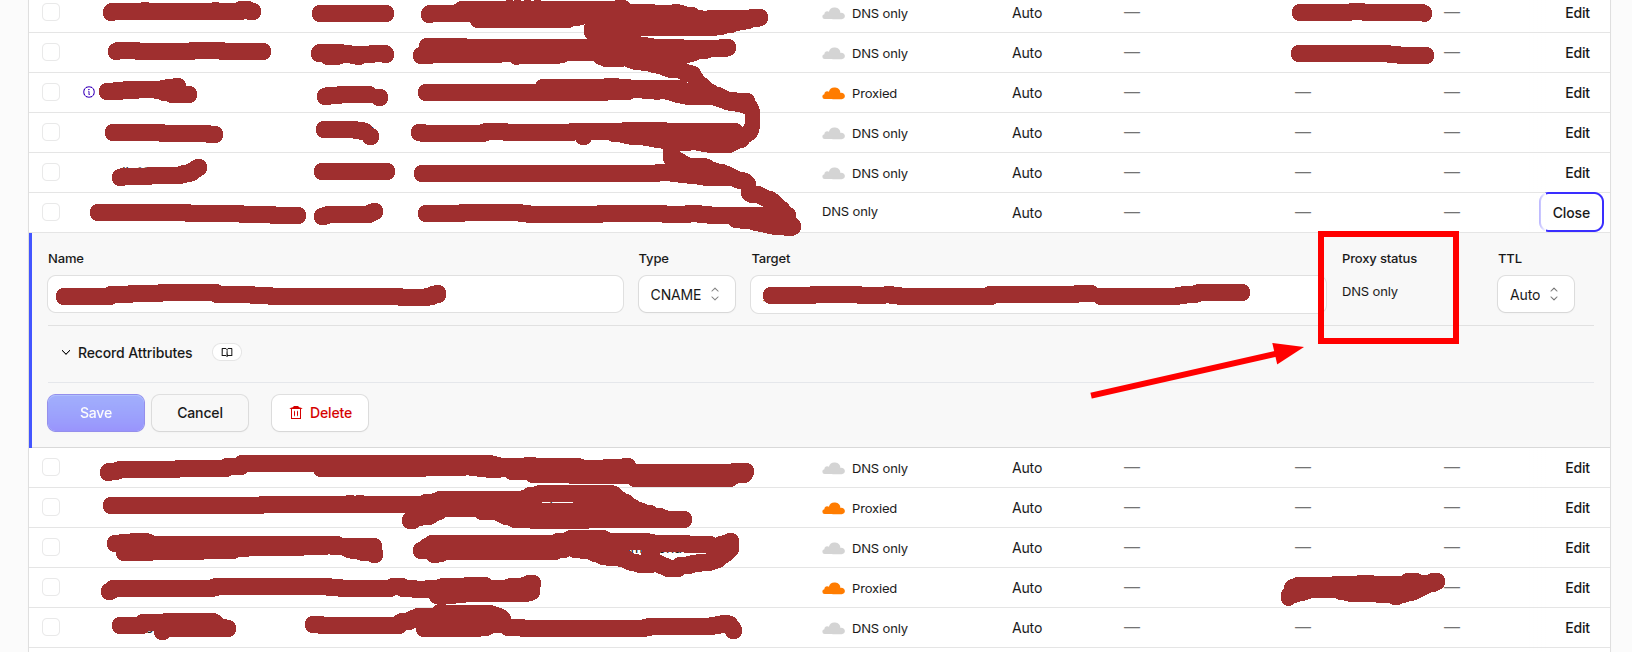
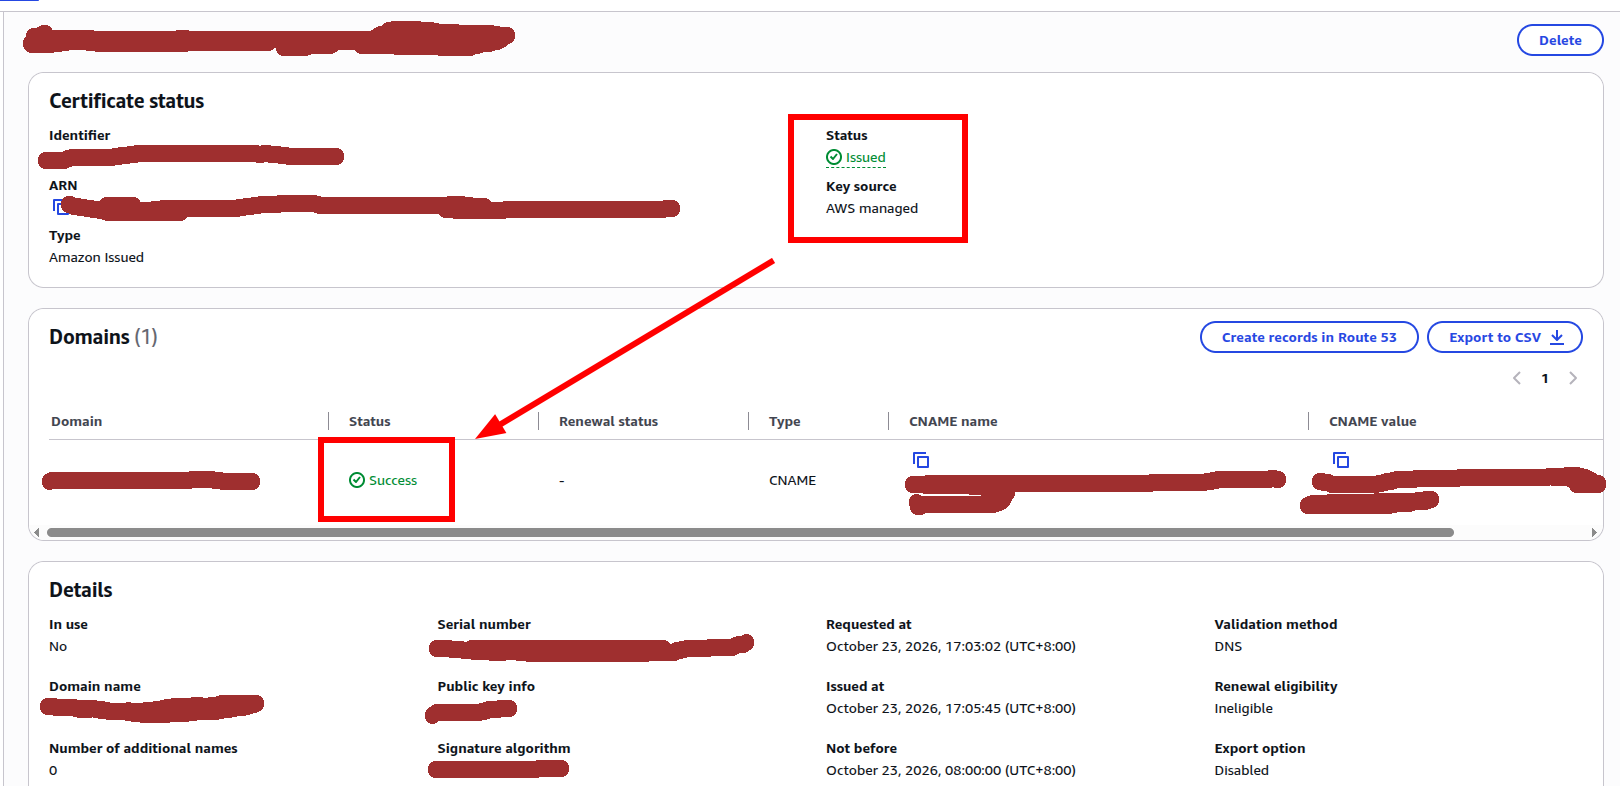
- Wait for the certificate to be propagated and verify it on the certificate details page
- If successful, the status will be updated like image below.
CloudFront Setup
- Create Distribution
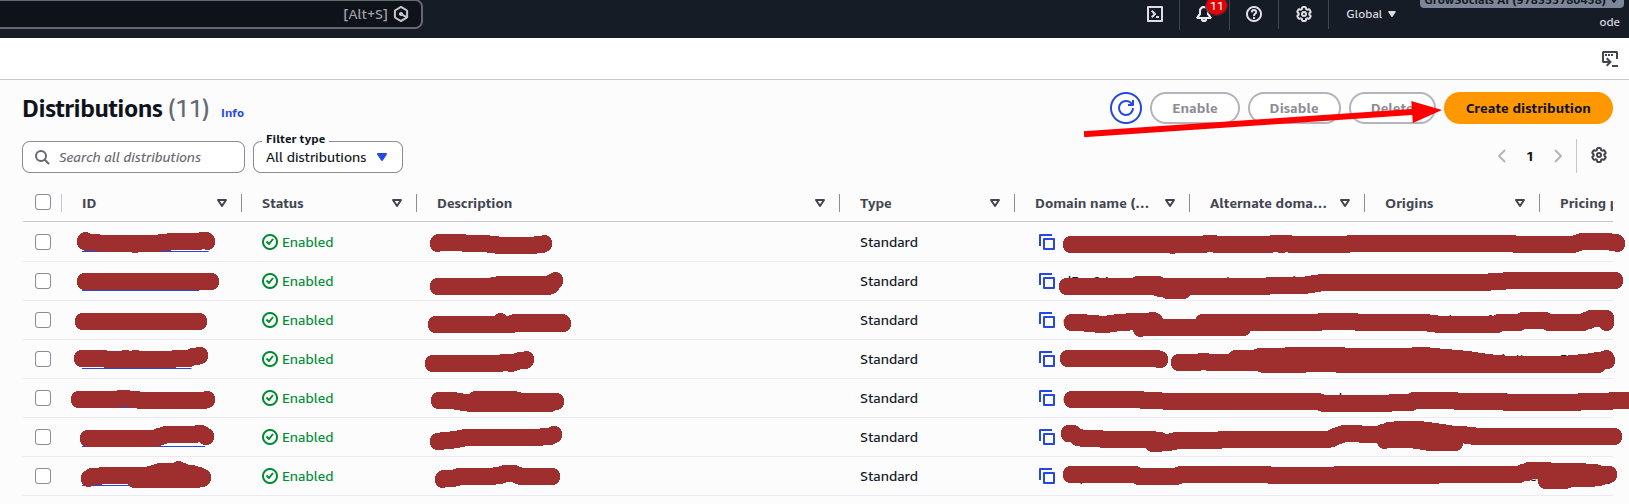
- Choose the free plan for Stage; Pay as you go for Prod
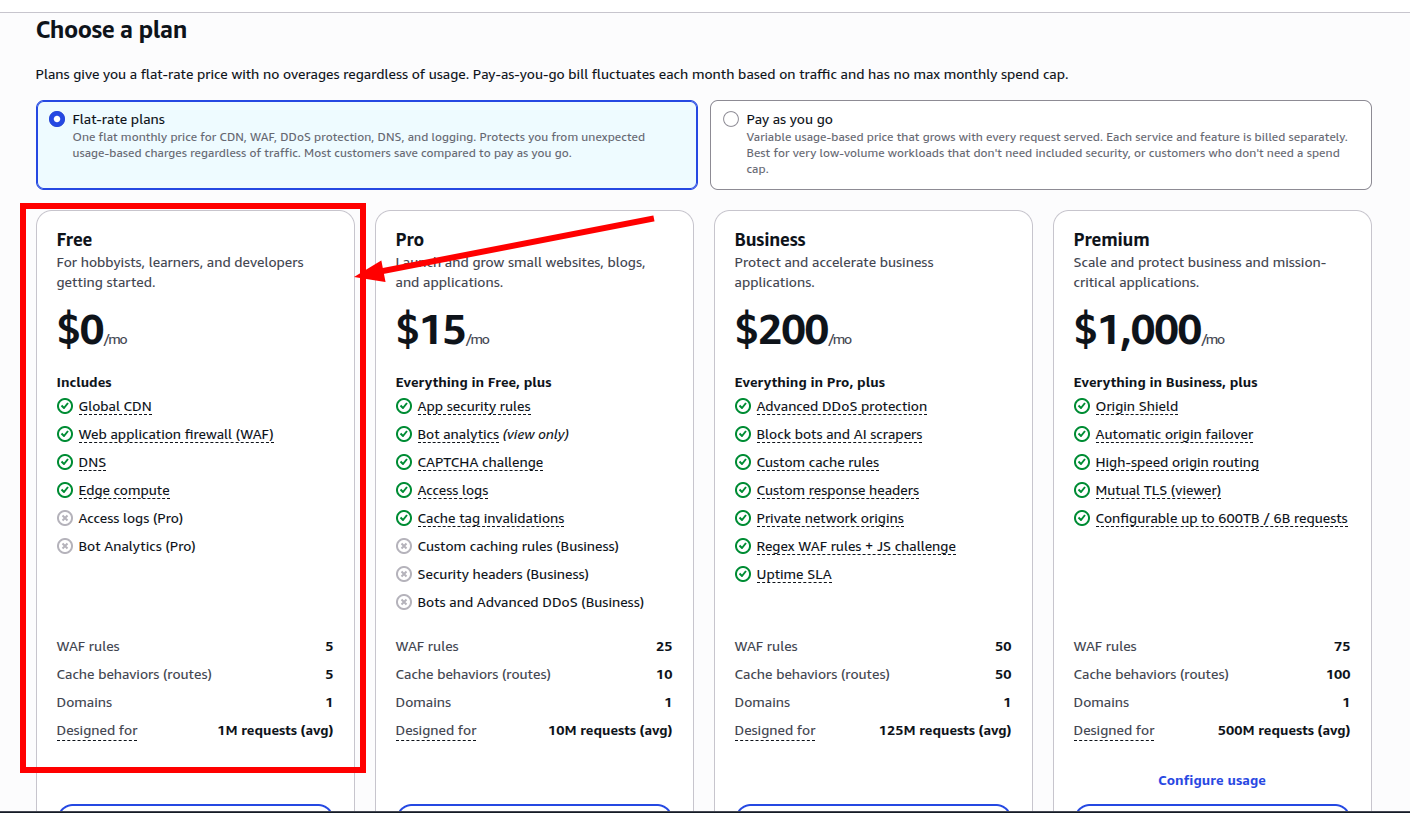
- Add the **Distribution name **and the **Description **as the same
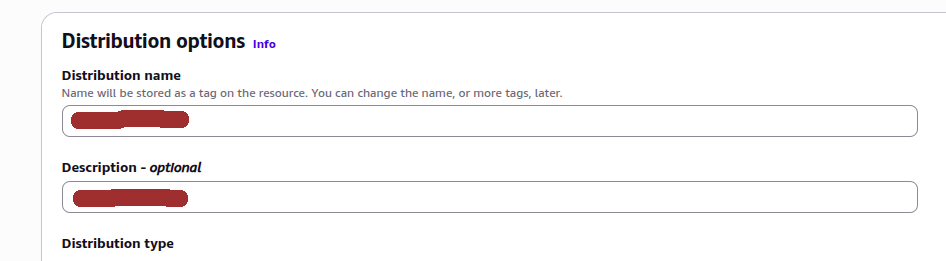
- Distribution type: choose Single Website
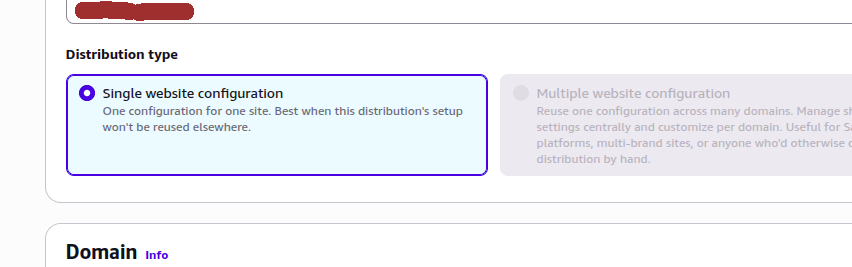
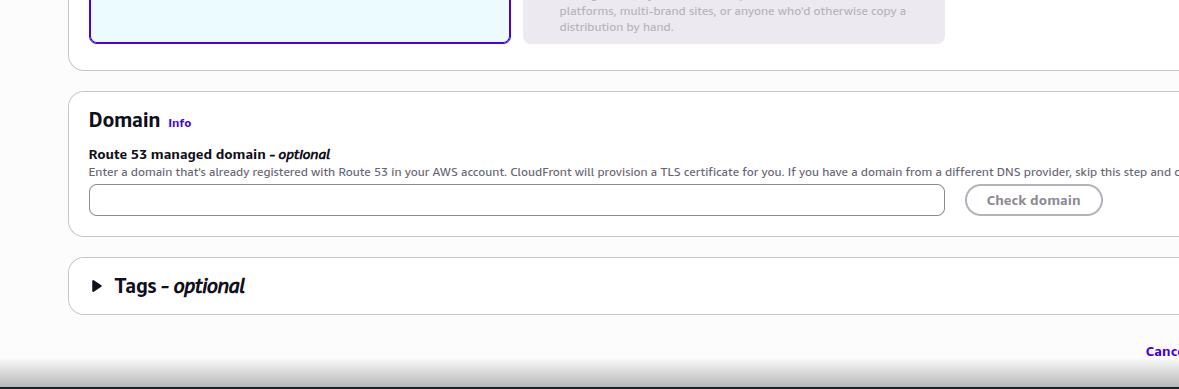
- Leave the Domain and Tags empty
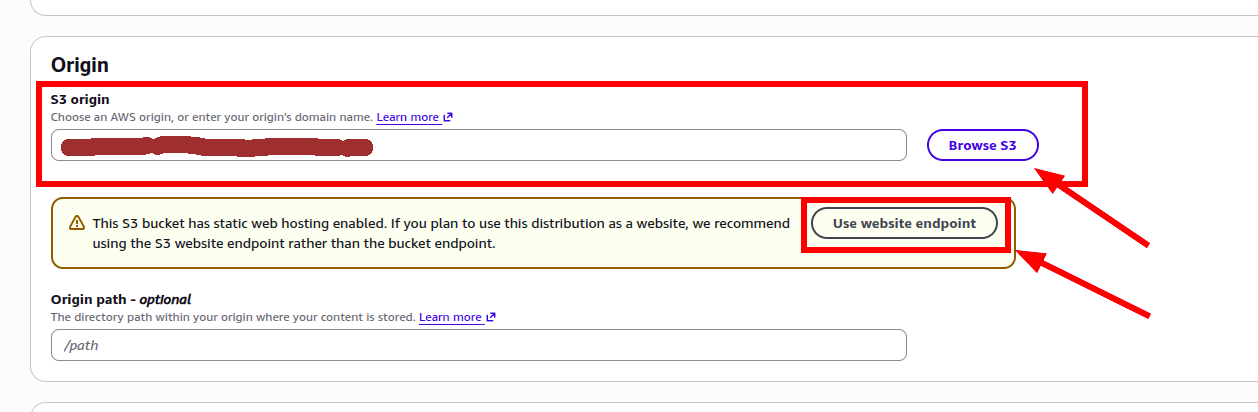
- Origin Type: choose Amazon S3
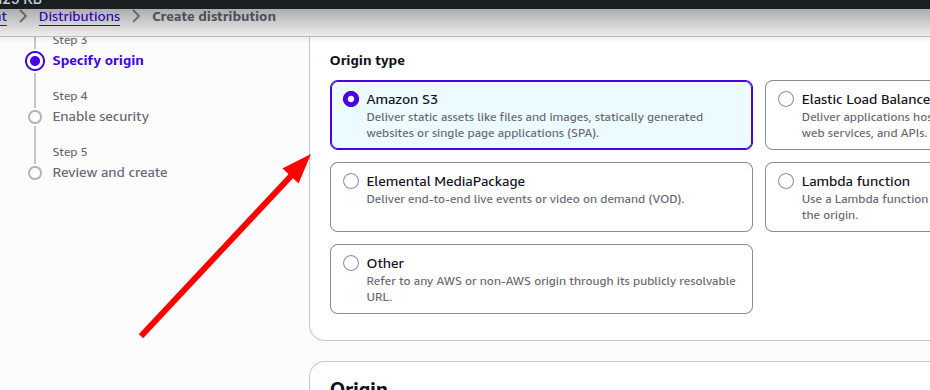
- S3 Origin: browse the S3 bucket that we already created, then click on the “Use website endpoint”
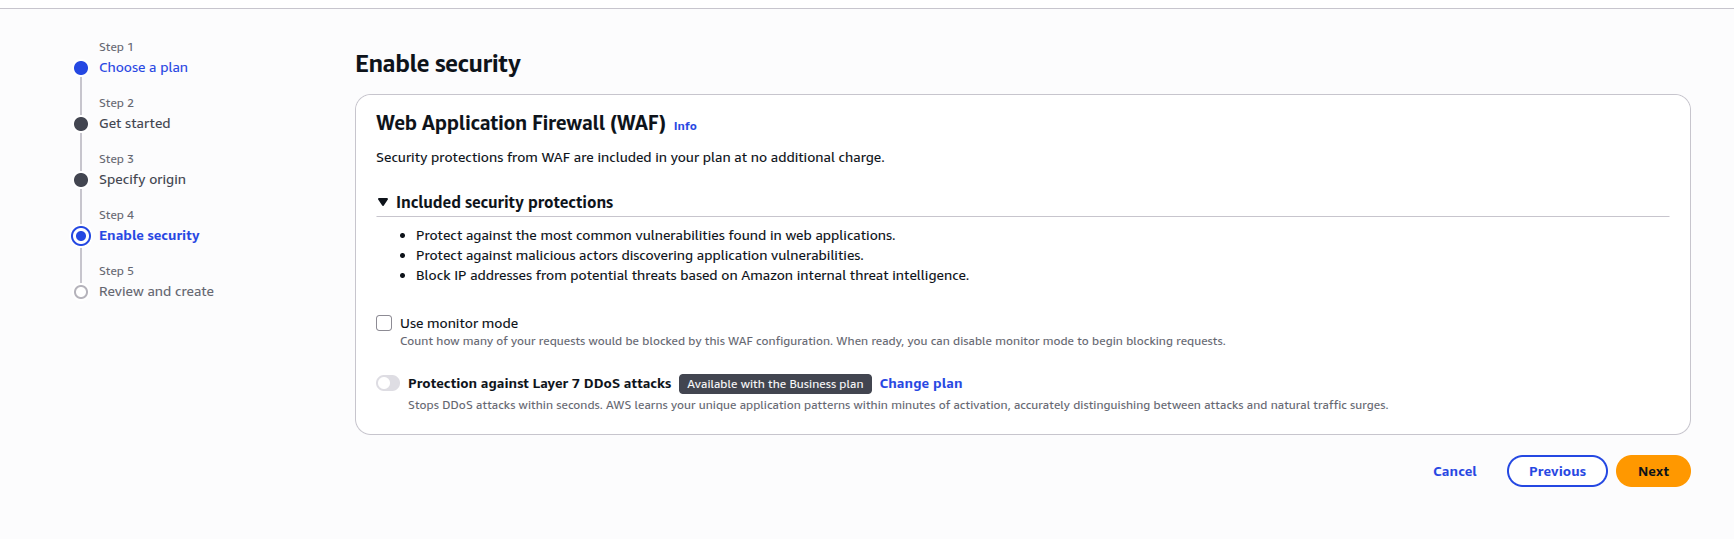
- Use default security option
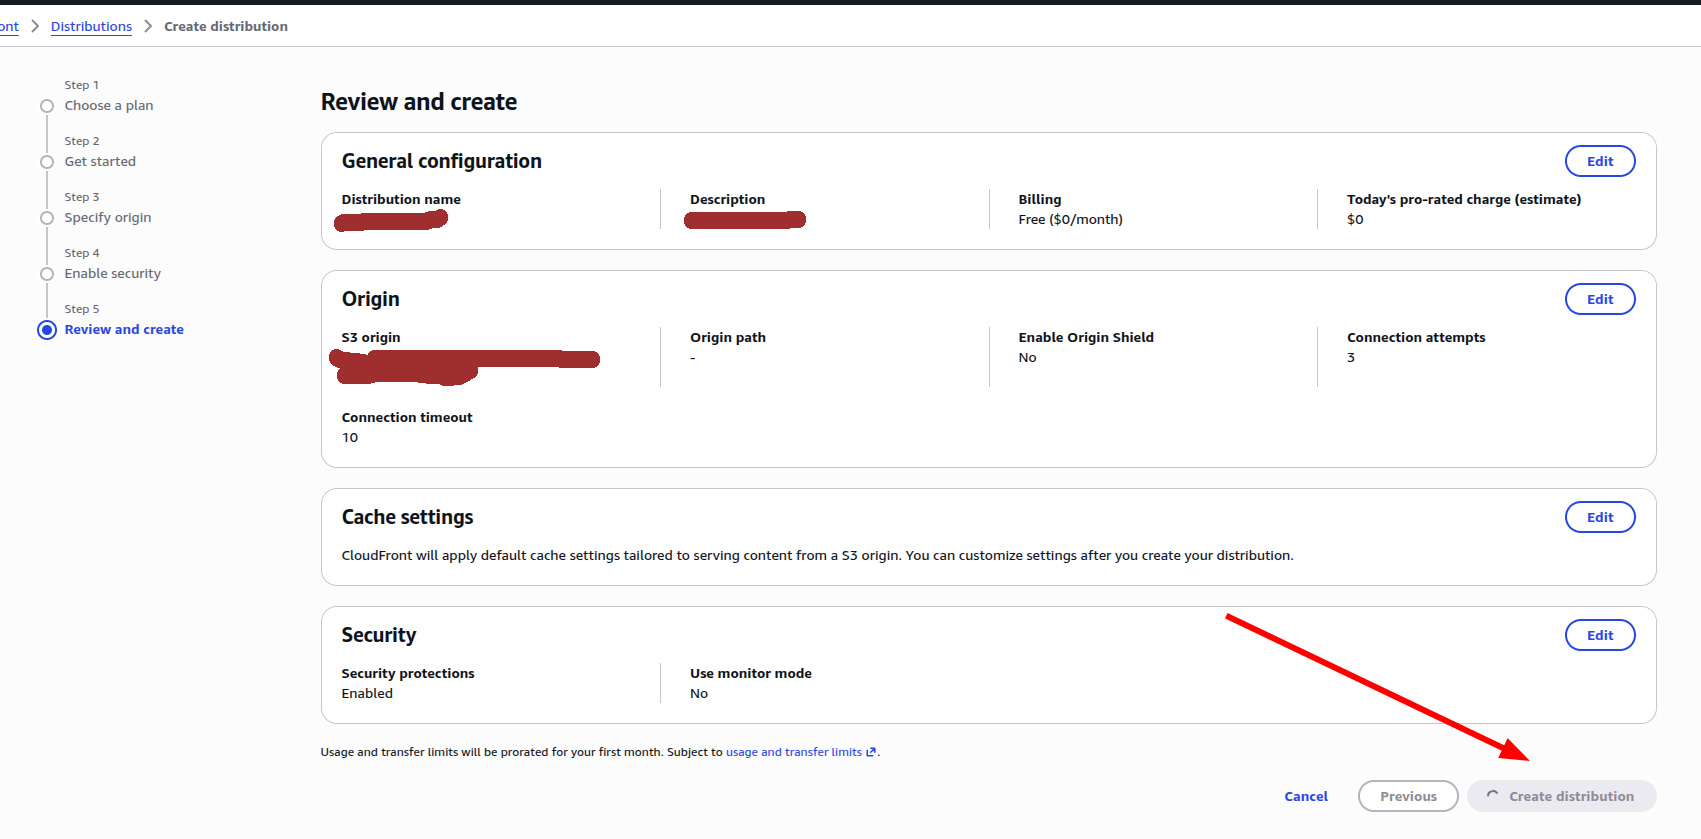
- Create distribution
- Open the distribution that we have create and add the domain
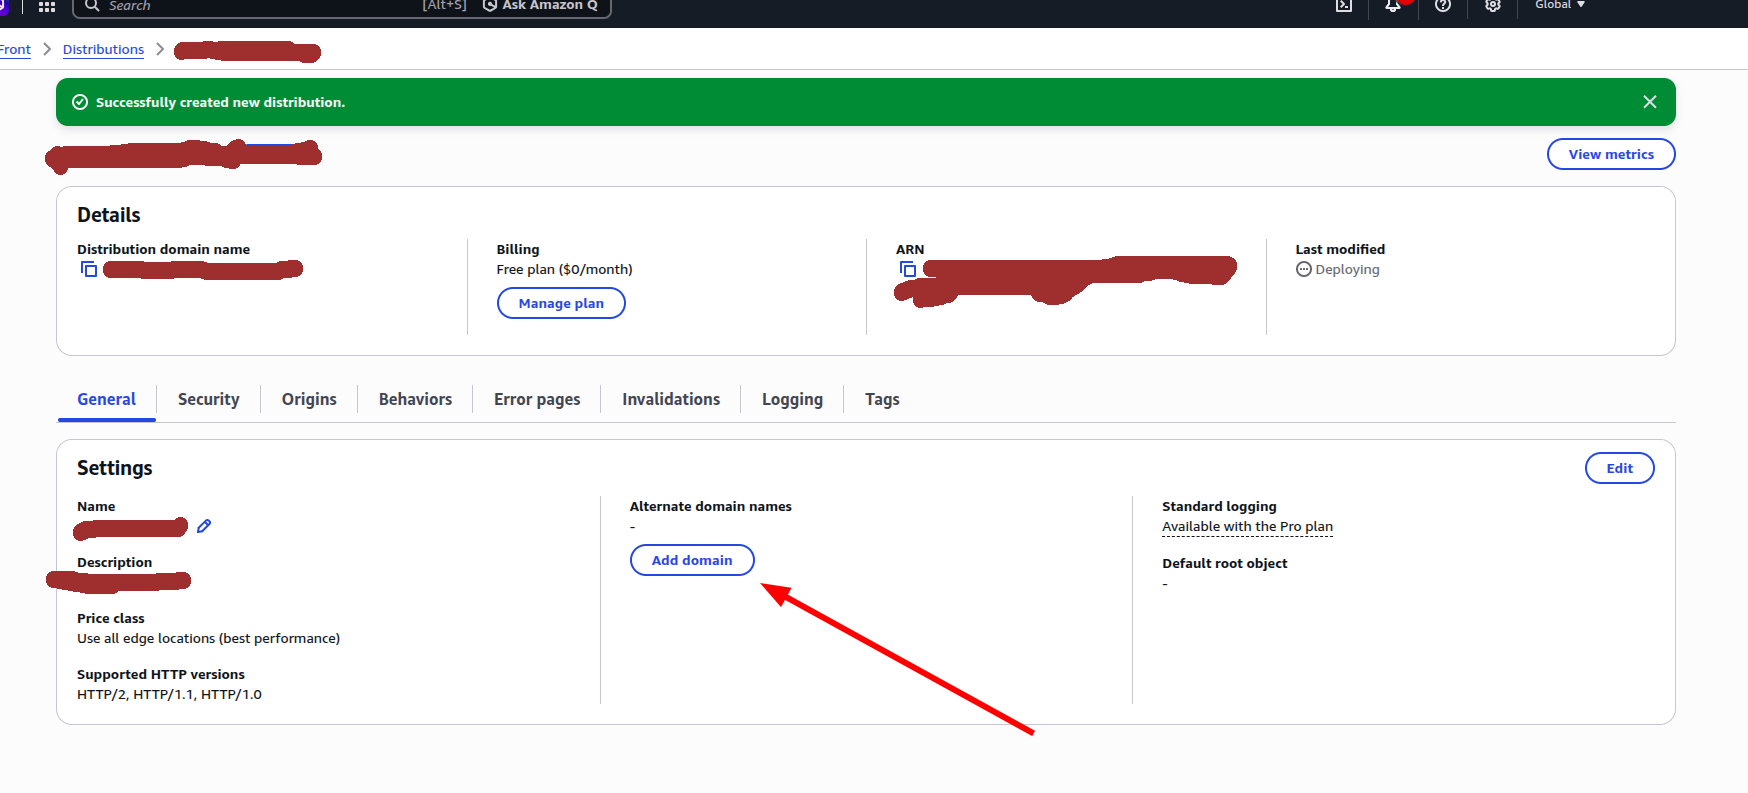
- Add the domain; make sure the domain is the same as the domain that we already registered in Certificate Manager
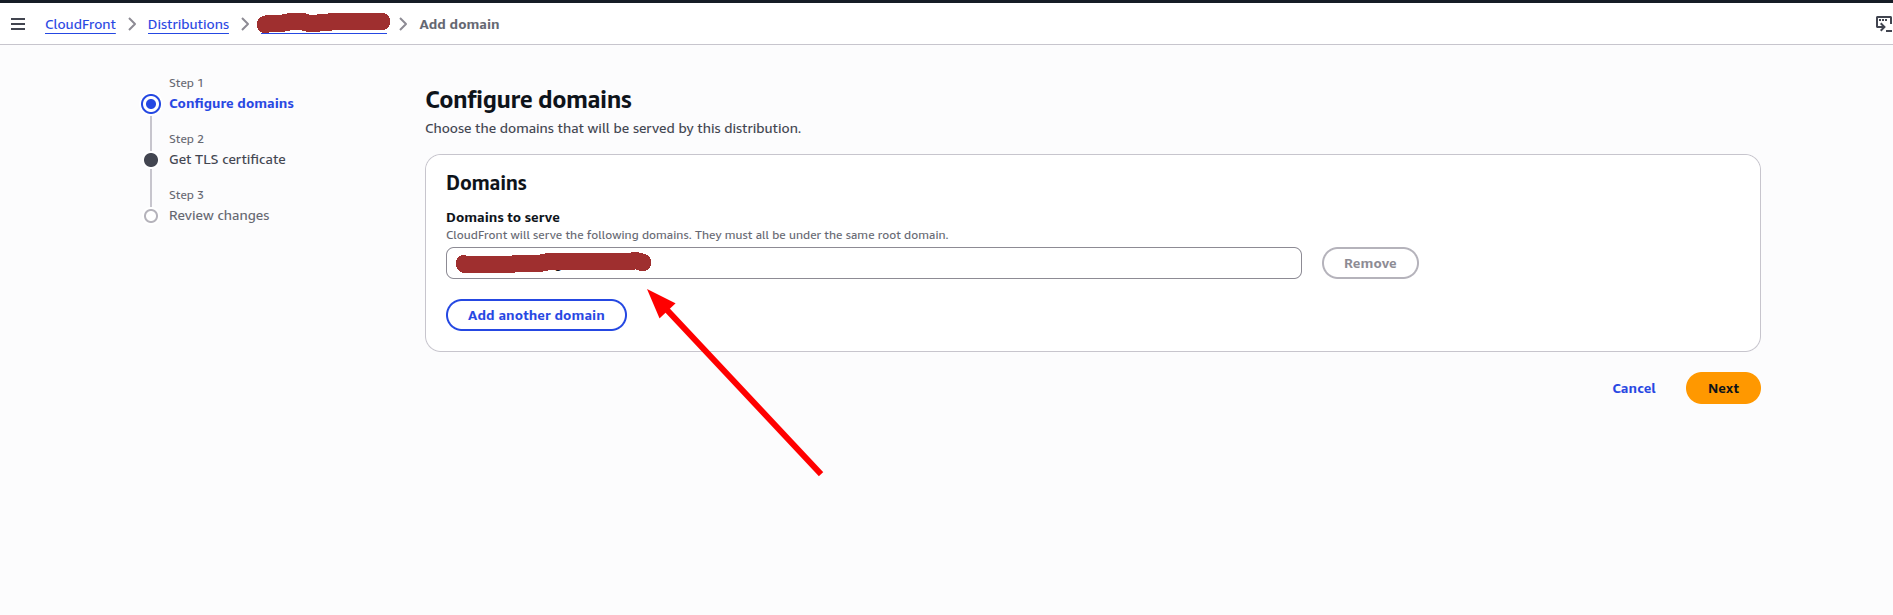
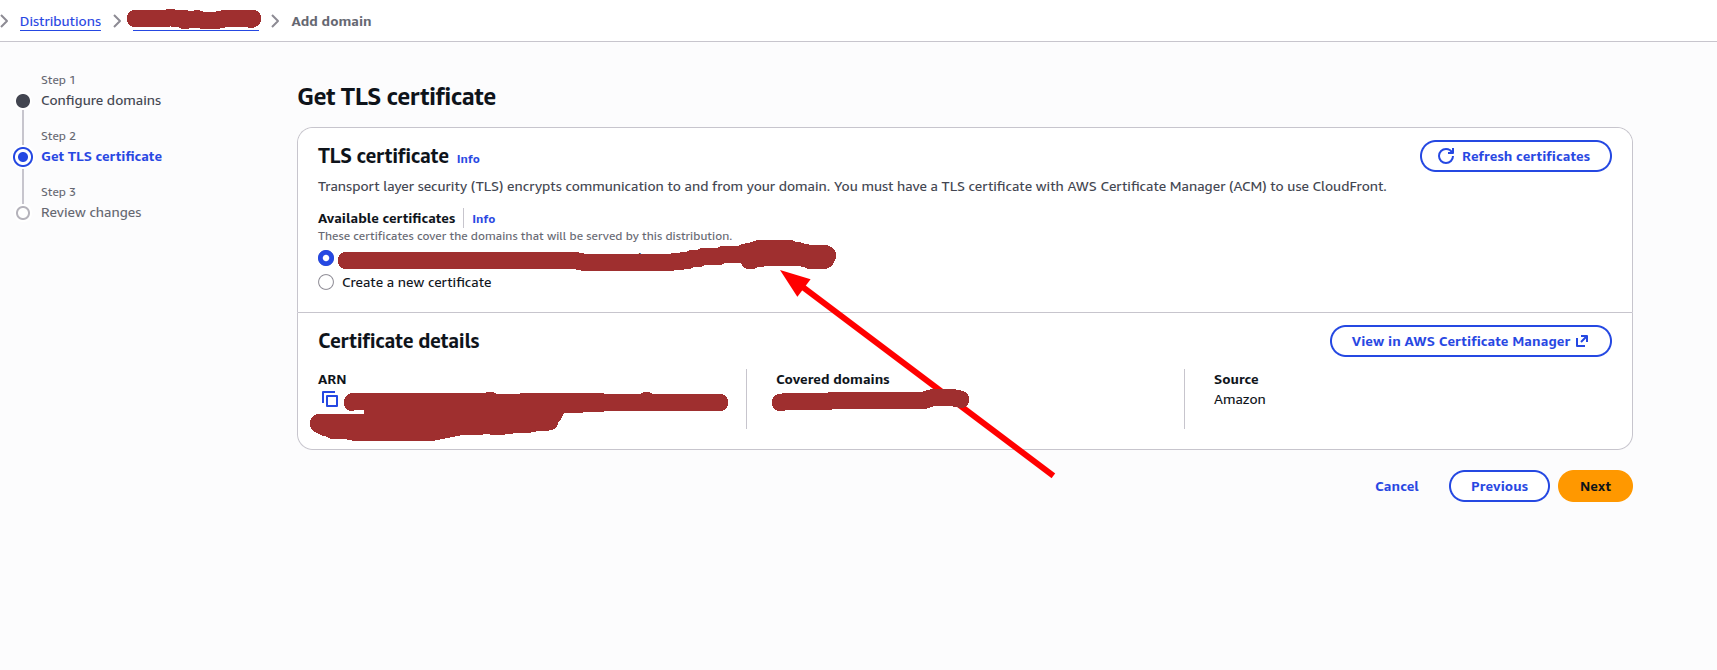
- Choose the certificate that we created in Certificate Manager; if the name is correct, it will be automatically chosen
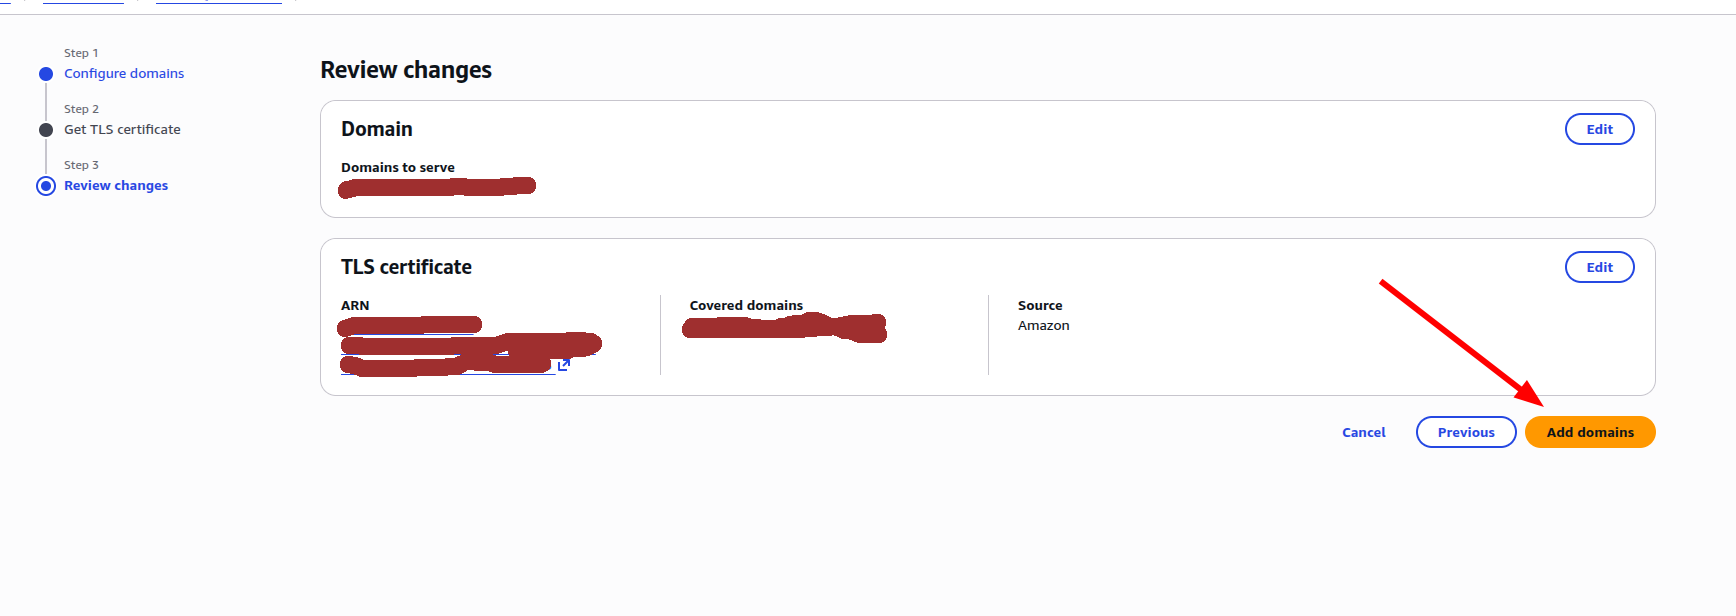
- Add domain
- Copy the distribution domain name in CloudFront
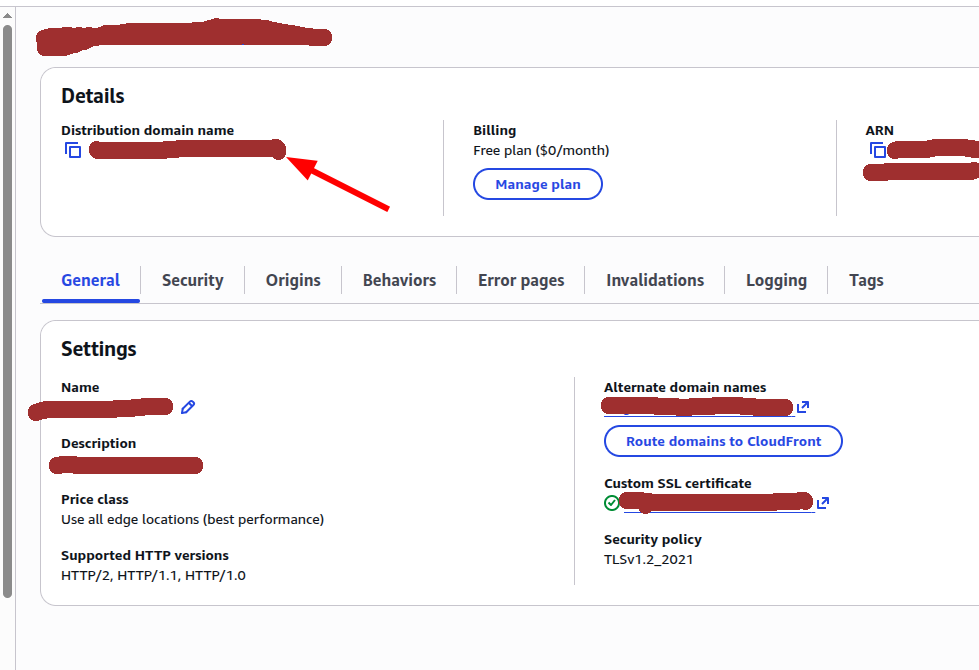
- Use the CloudFront distribution domain name as a CNAME value/target in Cloudflare Pages. And put the domain name as the name that we want to use for our app domain.
Frontend CI/CD Deployment
1. Deployment Flow Diagram
[ GitHub Actions Runner ]
        │
        ├─ 1. Checkout repository (ref)
        ├─ 2. Setup Node.js 20 & Yarn cache
        ├─ 3. Install dependencies (frozen-lockfile)
        ├─ 4. Vite build (injects VITE_API_BASE_URL)
        ├─ 5. Pre-compress assets (.js, .css with gzip -9)
        │
        ├────────────────────── AWS Credentials ──────────────────────┐
        │                                                             │
        ▼                                                             ▼
[ Amazon S3 Bucket ]                                        [ Amazon CloudFront ]
   ├── /assets/*.js  (gzip, max-age=1yr, immutable)                   │
   ├── /assets/*.css (gzip, max-age=1yr, immutable)                   │
   ├── /static/*     (images/fonts, max-age=1yr, immutable)           │
   ├── /.well-known/ (no-cache)                                       │
   └── index.html    (no-cache, entrypoint)                           │
                                                                      ▼
                                                            Invalidate Cache (/*)
                                                                      │
                                                                      ▼
                                                          [ End Users / Browsers ]
2. GitHub Configuration (Secrets & Variables)
Secrets and variables are scoped to GitHub Environments (**Settings → Environments → **staging) or repository-level (Settings → Secrets and variables → Actions).
3. How to Trigger a Deployment
Deployments are manual to ensure team control over releases.
Step-by-Step Instructions:
- Navigate to the GitHub repository: Actions tab.
- In the left sidebar, click on Deploy Frontend (S3 + CloudFront).
- Click the Run workflow dropdown on the right side.
- Fill in the parameters:
- Branch / Tag / Ref: Enter the branch (e.g.
main,develop, or a feature branch). - Deployment environment: Select or enter
staging(default).
- Branch / Tag / Ref: Enter the branch (e.g.
- Click Run workflow.
4. Deployment Lifecycle & Workflow Stages
The entire pipeline executes in a single self-contained file (.github/workflows/deploy-frontend.yml):
| Stage | Action | Description |
|---|---|---|
| 1. Checkout | actions/checkout@v4 |
Pulls source code at the specified branch or commit ref. |
| 2. Resolve Environment | Bash script | Normalizes environment name, checks whether frontend is in ./frontend or root, and extracts package.json version. |
| 3. Setup Node & Cache | actions/setup-node@v4 |
Installs Node.js 20 with Yarn cache enabled for fast subsequent builds. |
| 4. Install Dependencies | yarn install |
Runs with --frozen-lockfile to ensure reproducible dependency trees. |
| 5. Vite Build | vite build |
Runs with --mode=development (for staging) with 4GB max old space size and injects VITE_API_BASE_URL. |
| 6. Well-Known Sync | Shell copy | Copies public/.well-known or public/well-known into dist/ if present. |
| 7. AWS Configuration | aws-actions/configure-aws-credentials@v4 |
Authenticates GitHub Actions runner to AWS. |
| 8. Pre-compression | gzip -9 |
Compresses all .js and .css files into .gz counterparts. |
| 9. S3 Assets Upload | aws s3 cp |
Ships gzipped .js and .css with content-encoding: gzip and cache-control: public, max-age=31536000, immutable. |
| 10. S3 Static Sync | aws s3 sync |
Ships images, fonts, and icons with immutable cache. |
| 11. S3 HTML Sync | aws s3 sync --delete |
Ships index.html with no-store, no-cache, must-revalidate so clients always receive new bundle hashes immediately. |
| 12. CloudFront Invalidation | aws cloudfront create-invalidation |
Clears CDN cache on /* and /.well-known/*. |
| 13. Summary Report | $GITHUB_STEP_SUMMARY |
Prints detailed deployment summary in the Actions run dashboard. |
5. Caching Strategy & Rules
To provide instant load times while eliminating stale asset caching bugs:
- Fingerprinted JS/CSS (
/assets/*.js,/assets/*.css):- Cache-Control:
public, max-age=31536000, immutable(1 year). - Bundles have unique content hashes in filenames (e.g.
index-B2d9x1.js). When code changes, a new filename is generated.
- Cache-Control:
- HTML Entrypoint (
index.html):- Cache-Control:
no-store, no-cache, must-revalidate, proxy-revalidate, max-age=0(Expires: 0). - Browsers never cache HTML, meaning users always request the newest bundle references immediately.
- Cache-Control:
- CloudFront Invalidation:
- On every deploy,
/*is invalidated so edge locations immediately discard cached HTML and point to the newly uploaded build.
- On every deploy,